[box type=”note”]The following is our new process of translating as of October 28, 2013.[/box]
The question we’ve constantly asked ourselves is this: What is the most technically efficient way of accurately translating a sermon? Before translators would just download the subtitle file and translate it line for line, which worked, but it didn’t allow the translator to as easily translate the sermon while listening to it. We hope that for the most part these things have been figured out and that the below will be a more effective pipeline for translating.
[box type=”tick”]Step 1 – Subtitle Edit[/box]
First you need to download and install Subtitle Edit, click here to do so. (This software is from http://www.nikse.dk/subtitleedit/)
[box type=”tick”]Step 2 – Downloading Files[/box]
Go to the “Translate” page, click here, and decide on a video you want to translate and then download the SRT + the Video. Be sure to submit a Work in Progress ticket, you can do it at the bottom of that page.

[box type=”tick”]Step 4 – Removing Non-Subtitle Text[/box]
Now open up the .txt file of the .SRT that you downloaded and select all of the text that is above the first timecode. Meaning whatever is above the number 1, most files will only have a Title, Meta, Tags, this is information you will need to translate, but don’t want it part of your file as you load it into Subtitle Workshop. So select it and cut it out of the document and save it somewhere else.
[box type=”tick”]Step 5 – Loading Subtitle File[/box]
Once you open Subtitle Edit Select File –> Open and choose the .txt.
[box type=”tick”]Step 3 – Loading Video[/box]
Next select Video from the main menu and choose “Open video file…” and select the video file that you downloaded. If this is your first time using Subtitle Edit then the video display is probably turned off and you don’t see anything. So on the menu select Video –> Show/hide video or Ctrl + Q to get the video display to show.
If the video still does not show then your computer may not have the right video codec for the encodings of the files, you can download Codec pack here.
[box type=”tick”]Step 6 – Getting ready for translating[/box]
Select Tools –> Make new empty translation from current subtitle
You now have a blank subtitle file to type your translation in.
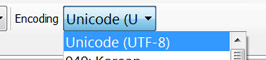
[box type=”tick”]Step 7 – Turning on Unicode[/box]
In order for some language characters to show up correctly you need to turn on Unicode Encoding.
[box type=”tick”]Step 8 – Other[/box]
Above the video you will see the option “Select current subtitle while playing” be sure to Check that on, this will auto select the subtitle to where it is at in regards to the video.
To see your translated text in the video preview, instead of the original English, go to Edit and uncheck “Show original text in audio/video previews” which is automatically checked. Now the lines that you’ve translated will show up in the preview.
[box type=”tick”]Step 9 – Exporting[/box]
To export the completed translation go to File –> Save As, have the File type be (*.srt), which it usually is automatically. When naming the file put your language name in-front of the title, for example Greek – O Magnify the Lord With Me – Bob Jennings.